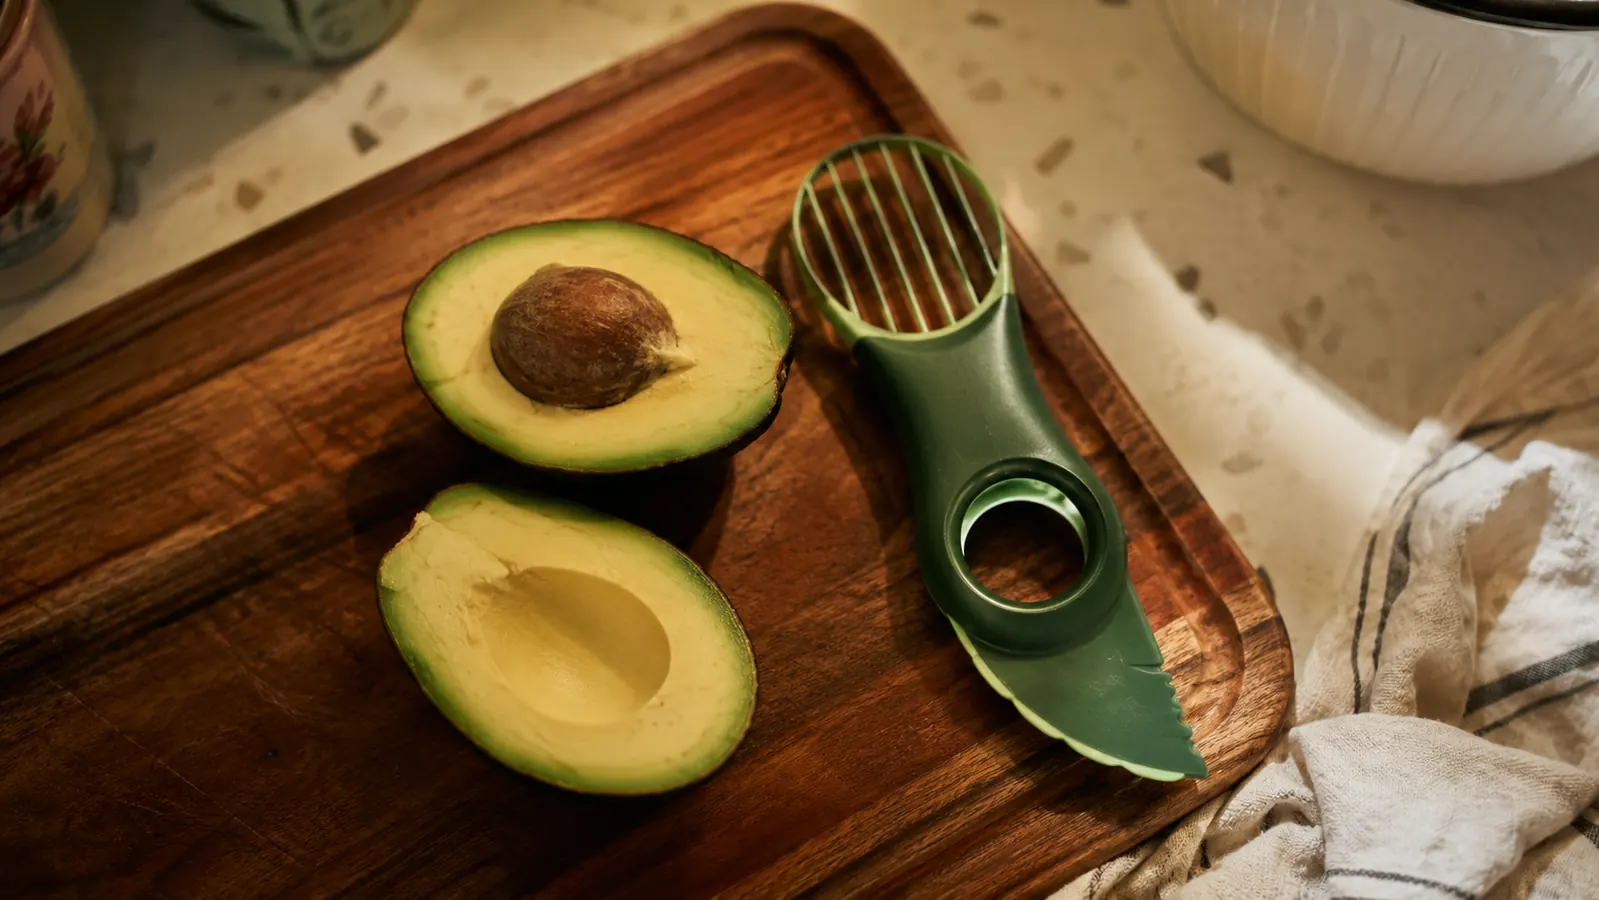
I used to be a knife-in-the-pit person. I know exactly how that ends, because it ended for me on a Tuesday night in my own kitchen, blade skidding off the seed and opening up the side of my thumb while I had four people already sitting at the table waiting on guacamole. Six stitches and an unplanned trip to urgent care later, I bought an inexpensive NADOBA 3-in-1 avocado tool, and I have not put a knife anywhere near a pit since. That was almost two years ago.
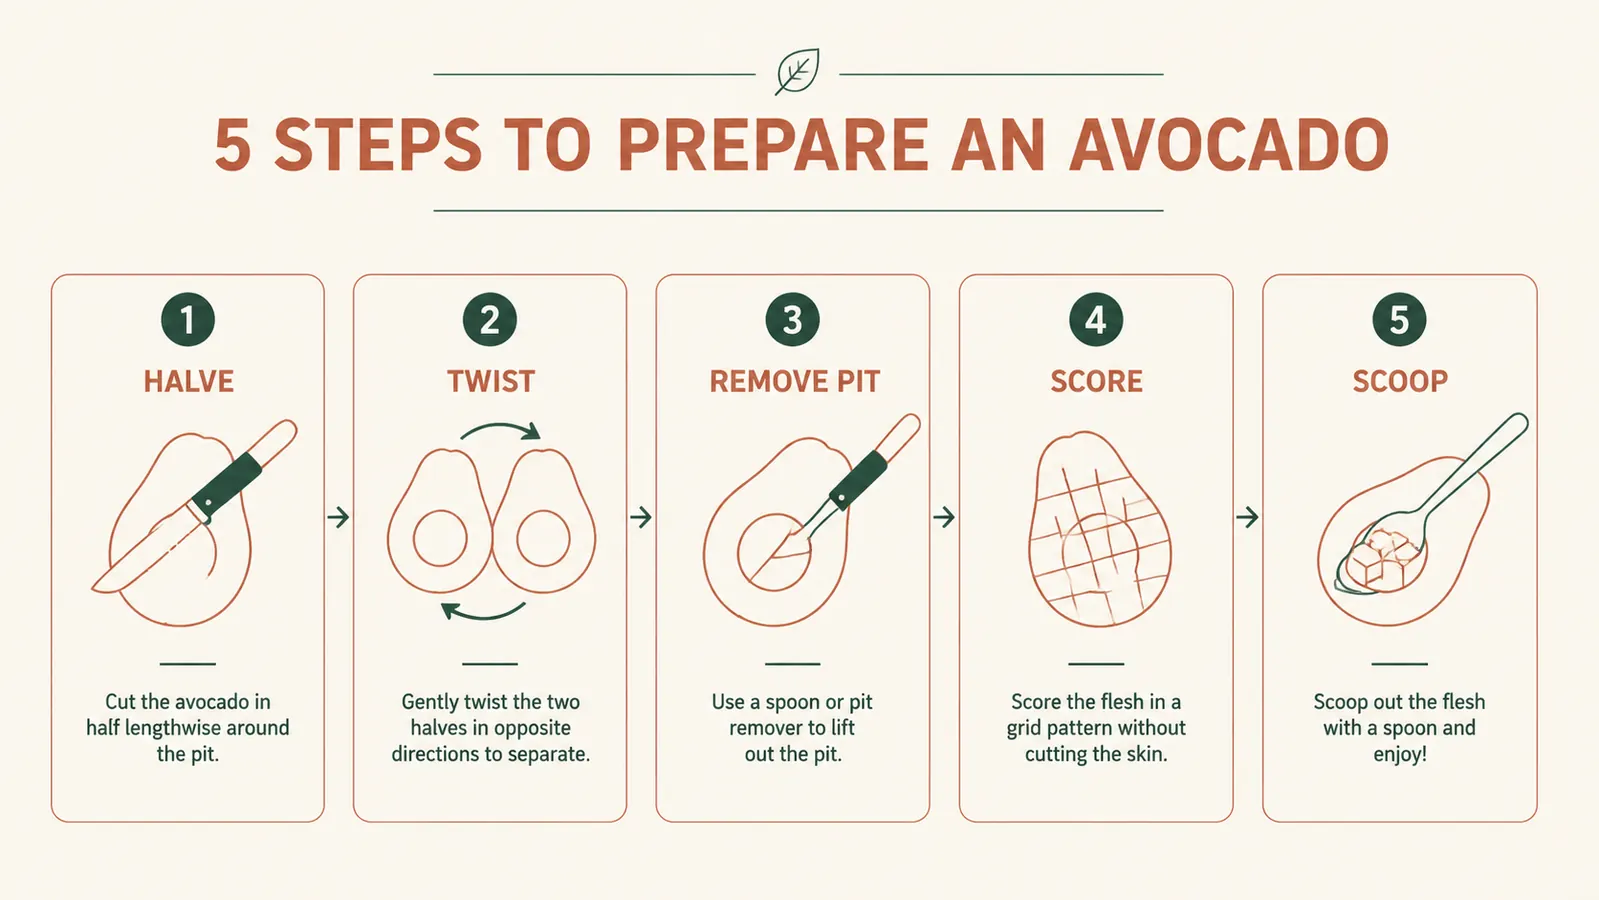
This is not another version of the knife-whack trick. If you search how to pit an avocado, you will find a hundred videos telling you to smack the pit with the heel of your chef's knife and twist it loose. It works, until the one time it doesn't, and when it doesn't, you're the one in the waiting room explaining what happened. What I'm walking you through instead is the five-step method I actually use most nights, using a plastic tool that slices, pulls the pit, and scoops the flesh, all without a sharp edge ever getting near the hand that's holding the avocado.
Skip the knife entirely. This is the budget-friendly tool that ended my ER trips.
The NADOBA 3-in-1 does the slicing, the pit removal, and the scooping with zero blade risk. It's the exact tool I'm using in every step below.
Amazon Check Today's Price on Amazon →Why the Knife Trick Keeps Sending People to the ER
There's an actual name for this injury now, avocado hand, because it happens often enough that emergency rooms started tracking it. The mechanism is almost always the same: you're holding the avocado in your palm, the knife strikes the pit at an angle instead of square, and the blade skips off the hard, round, slightly slick surface of the seed and continues straight into whichever hand is wrapped around the fruit. It's not a rare freak accident. It's a predictable outcome of using a long, sharp, flat blade against a small round target while your own hand is the backstop.
The five steps below solve that problem by changing where the force goes. The only knife work happens in step one, slicing around the outside of the fruit, where your hand is cupping the whole avocado rather than gripping something small the blade could deflect off. Every part of the process that involves the pit itself uses the tool, which is built low-force and blunt enough that a slip doesn't turn into a trip to urgent care.
Step 1: Slice Around the Avocado, Not Through the Pit
Set the avocado on a cutting board so it can't roll, stem end up. Using a regular paring knife, one you're already comfortable holding, cut lengthwise around the entire avocado, tip to tip, letting the blade slide along the outside of the pit rather than trying to cut through it. You'll feel the knife bump against the seed the whole way around. That contact is fine, you're just tracing its shape, not attacking it.
This is the only part of the whole process where a knife touches the avocado, and it's the safe part, because your hand is wrapped around the outside of the fruit, not gripping something small and round that's trying to slide out from under the blade. I hold the avocado in my left palm, fingers curled under, and let the knife do one continuous pass rather than a sawing motion. One clean loop is all it takes.
If your avocado is properly ripe (it should give slightly to gentle thumb pressure near the stem, not feel mushy), the knife will glide through the flesh without any resistance until it hits the pit. If you're fighting the knife the whole way around, the avocado probably needs another day on the counter. Trying to force a hard avocado is where most cutting accidents start, tool or no tool. A butter knife or paring knife works better here than a big chef's knife anyway, since you have more control over a smaller blade when you're tracing a curved line instead of pushing straight down.
Step 2: Twist the Halves Apart
Once you've sliced all the way around, set the knife down completely. Place a hand on each half of the avocado and twist in opposite directions, the way you'd open a jar. The two halves should separate cleanly, with the pit staying seated in whichever half it decides to stick to, usually random, sometimes the stem side, sometimes not.
You'll feel a little resistance right before the halves let go, and then they'll pop apart with almost no effort. If it feels like you're really fighting it, don't force a twist while gripping near the blade line, back off and check whether your knife actually made a full loop around the pit. A partial cut is the most common reason a twist won't separate cleanly.
It genuinely doesn't matter which half ends up holding the pit, and don't waste time trying to control it. I used to assume the stem side always kept the seed, it doesn't, avocados are inconsistent about this. Whichever half you're left holding with the pit still seated is simply the one you move to step three first. The empty half just gets scored and scooped right away with steps four and five.
Step 3: Remove the Pit With the Tool, Not the Blade
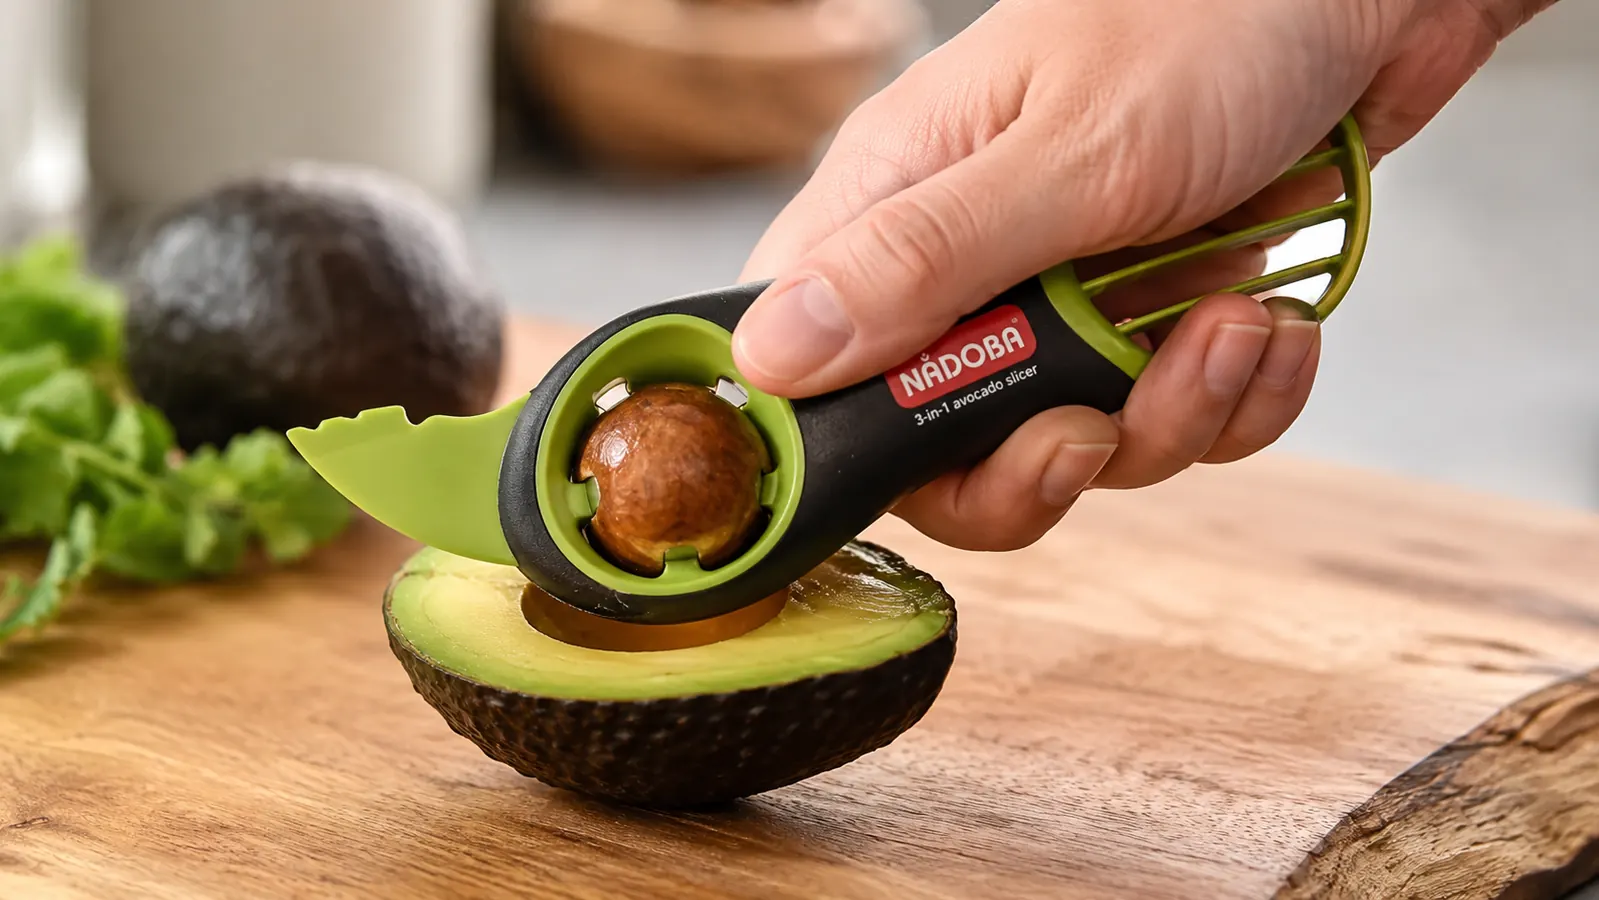
This is the step that used to send me to urgent care, and it's the whole reason I bought the tool. Set the pit-holding half flesh-side up on the cutting board. The NADOBA tool has a claw-shaped end built specifically for this, plastic prongs shaped to grip around the seed without needing force straight down into your palm.
Press the claw end down over the center of the pit until the prongs seat around its edges, then twist gently and lift straight up. The pit pops free and stays caught in the claw, so you can just flick it into the trash or compost without touching it with your fingers. No blade, no downward force toward your hand, no risk of the tool slipping off a round, slick pit and continuing into your palm, which is exactly how the knife trick goes wrong.
The first few times I used this I honestly didn't trust it, it felt too easy after years of the knife method. But I've pitted probably four hundred avocados with this same tool since, and it has never once slipped toward my hand. That's the whole point of a purpose-built claw shape versus a chef's knife doing a job it wasn't designed for. It's also the step I hand off to my teenager without a second thought, which was never happening with a knife.
Step 4: Score the Flesh While It's Still in the Skin
With the pit out, flip the tool around to the slicer end, the flat grid of thin plastic blades. Press it down through the flesh of each avocado half while the fruit is still sitting inside its skin, right down to (but not through) the peel. One firm, even press does the whole half at once, no sawing back and forth.
This is where the tool earns its keep over a knife for anything beyond a single slice. Doing this by hand with a knife means eight or ten individual cuts, each one a chance for the blade to catch the skin or your supporting hand. The grid does it in one motion, and because the blades are shallow and dull-edged compared to a kitchen knife, there's nowhere near the same risk if your grip slips.
For toast, I score it into roughly half-inch cubes. For salads or grain bowls, I'll go a little smaller. For a single showpiece slice fanned over avocado toast, I skip the grid and use the tool's slicer blade in one long pass instead, but the grid is what I reach for on a normal weeknight when I want diced avocado fast. The plastic is food-grade and BPA-free, which matters since the blade edges do sit in direct contact with what you're about to eat.
One thing worth knowing: the slicer grid is sized for a standard Hass avocado, the small, dark, pebbly-skinned kind sold in most grocery stores. If you're working with a larger, smooth-skinned avocado variety, the grid will still score the flesh fine, it just won't reach every edge in one press, so I'll go back over the outer rim with the tool a second time or finish those last couple of strips with the spoon end directly.
Step 5: Scoop It Out With the Spoon End
The third end of the tool is a curved, spoon-shaped edge, and this is what actually gets the scored flesh out of the skin. Run the curved edge between the peel and the flesh in one motion, following the shape of the skin, and the whole scored half releases into your bowl or straight onto toast in one piece.
This is genuinely the part that saves the most time on a weeknight. A regular spoon works, but it tends to tear the flesh into uneven chunks and leave green streaks stuck to the peel that you end up scraping at with your fingernail. The curved plastic edge follows the natural bowl shape of an avocado half far more precisely, so you get cleaner cubes and less waste left behind in the skin.
Once both halves are scooped, rinse the tool under warm water, it's dishwasher safe too, and you're done. From first slice to a bowl of diced avocado, this whole process takes me under two minutes, and at no point did a sharp blade come anywhere near the hand holding the fruit.
What Else Helps
A couple of things make this method work even better. First, buy avocados a few days ahead and let them ripen on the counter rather than grabbing a rock-hard one at checkout and trying to force it same-day, a firm avocado is harder to slice cleanly and more likely to make the knife step in step one feel like work. Second, if you're only using half, leave the pit in the unused half, rub the cut surface with a little lemon or lime juice, and press plastic wrap directly against the flesh before refrigerating. It buys you an extra day before it browns.
Third, keep the tool in the same drawer as your everyday utensils, not tucked away with specialty gadgets, because the version of this that actually prevents knife injuries is the one you reach for automatically instead of grabbing whatever knife is already out on the counter. Mine lives right next to the vegetable peeler, and it comes out almost every time I open a bag of avocados. Fourth, it's worth handing this exact tool to any kid or grandparent in your house who's been doing the knife-and-twist trick out of habit. The learning curve is about one avocado, and it removes the single riskiest motion in the whole recipe from anyone still figuring out knife control.
Fifth, wipe the tool down right after you use it rather than letting it sit in the sink. Avocado residue dries into a slightly waxy film on the plastic prongs and grid that's annoying to scrub off later, but it wipes away in seconds while it's still wet. A quick rinse under the tap and a pass with a dish towel is usually all it needs before it goes back in the drawer.
The safest tool in your kitchen is the one that keeps a blade away from whatever your other hand is wrapped around. That's the entire argument for this thing.
Two minutes, zero knife risk, done every night this way.
If you're still doing the knife-and-twist trick, the NADOBA 3-in-1 pays for itself at today's price the first time it saves you a trip to urgent care.
Amazon Check Today's Price on Amazon →